Zones
Here you can upload a
.geojson file containing a perimeter which will mark the delivery area.
Creating a .geojson file
This is how you create the delivery zone or perimeter by using any software that allows the creation of a polgyon and saving or exporting a .geojson file.
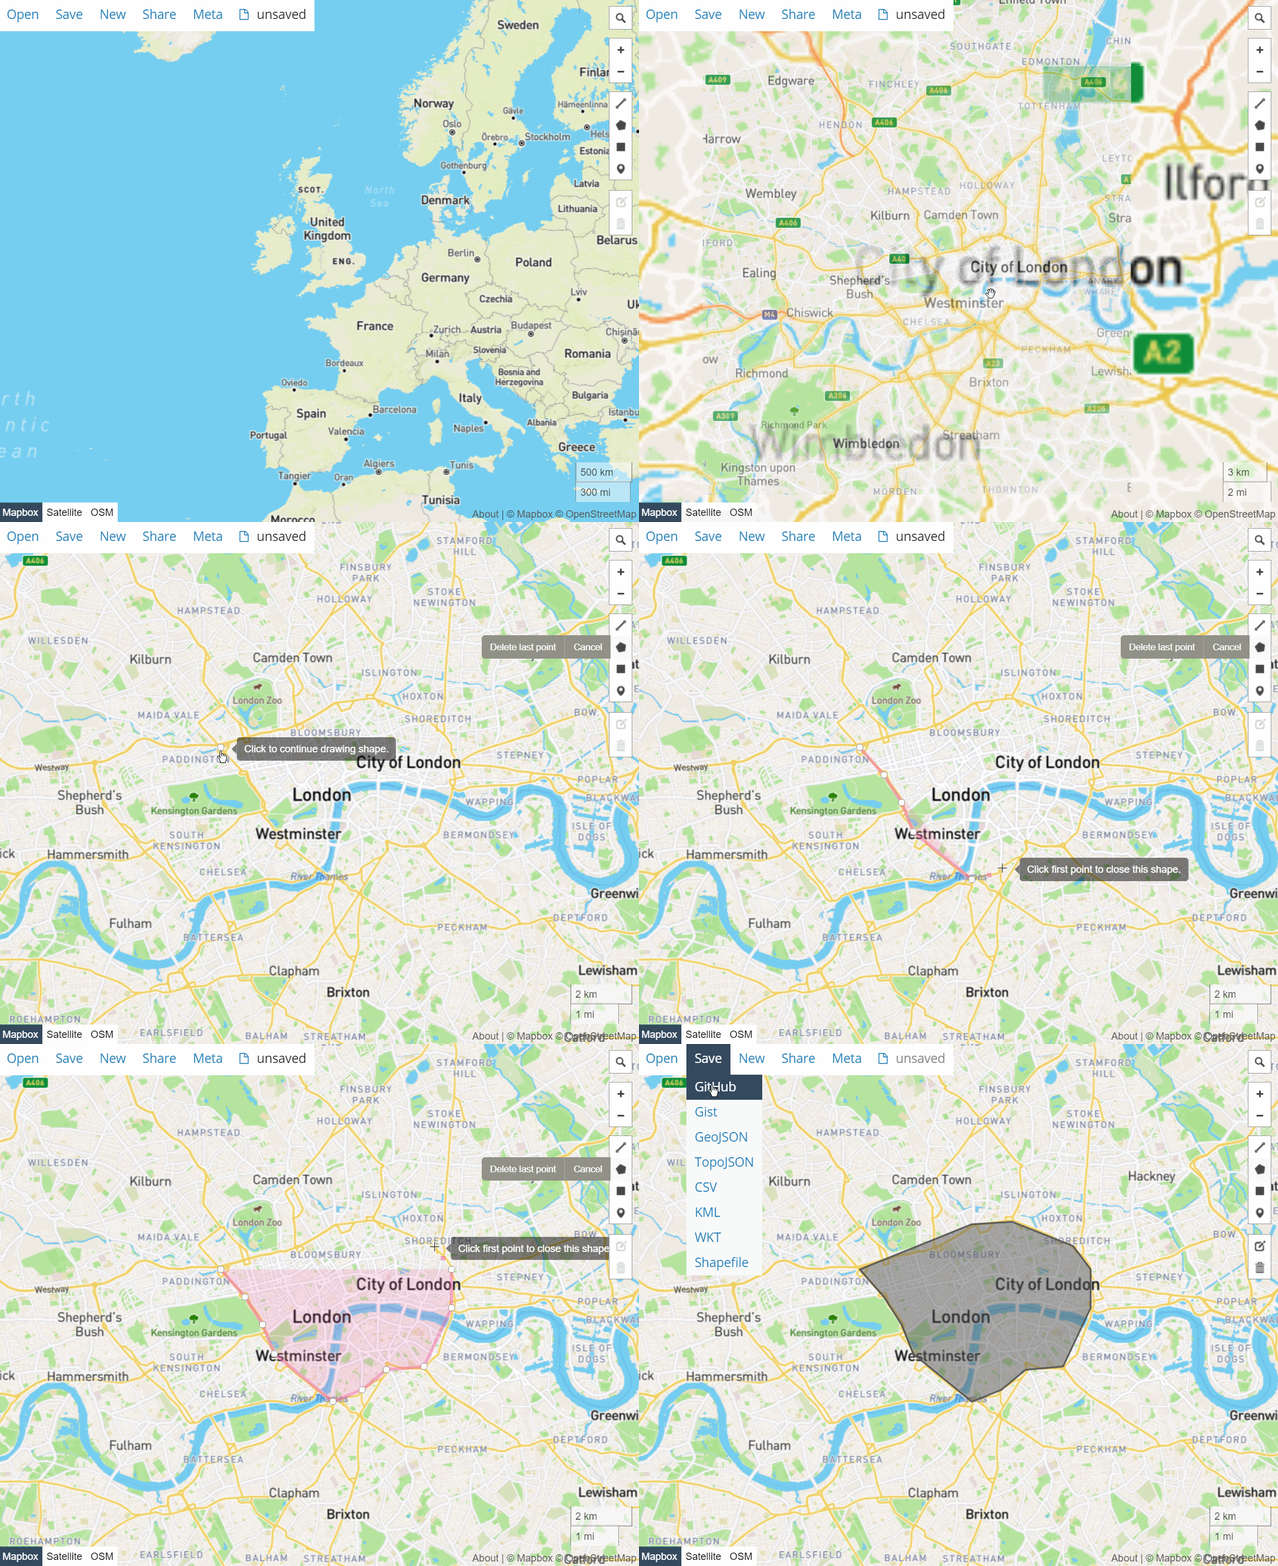
- Go to the online software geojson.io
- Zoom in to the specific area you want to create a perimeter around.
- Select the polygon
 tool on the right-hand side vertical bar.
 -
Once the tool is selected, click once anywhere you want, move your cursor to the next area on the map and click again. This will form a straight line between those first two pins, keep going until you reach the first pin you created and click right on it for the polygon (zone or perimeter) to form.
TIP: To move around the map whilst drawing the polygon, simply hold left-click whilst moving the map, unhold the left-click and continue drawing the polygon.
- Once you’ve finished creating the zone, hover over the Save button on the top-left corner and select GeoJSON.
- This will download the
.geojsonfile.
Upload the .geojson file
- On the Zones main page click on File and select the
.geojsonfile. - Click on Send to upload the file to the platform.
- Once uploaded, on the Zones main page a preview map of the zone will be displayed.
Below is a GIF example on how to use the geojson.io software.
